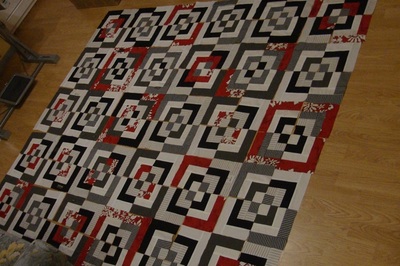
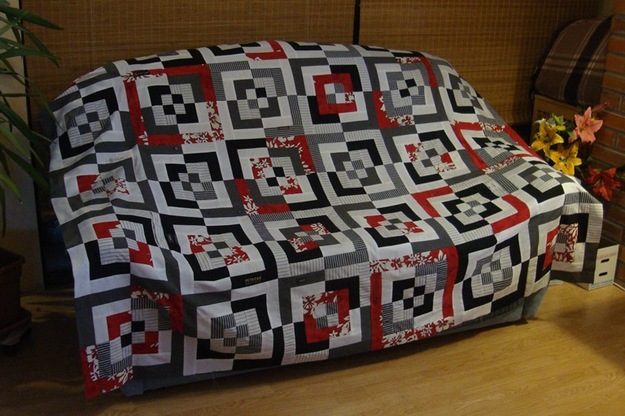
The pattern of Karl's quilt is finished.
The moment I put the photograph of Karl's quilt pattern online, someone wanted to buy it straight away. 🙂 It is so lovely to hear that my work calls up such a lively response.
Karl's quilt still goes to Karl. And an order for a new red, black and white quilt goes in the book.
I wrote about sewing the pattern blocks in an earlier post. This time it is about how to lay the finished blocks out into the quilt's pattern.
A mathematical oops.
I got the arithmetic of this quilt slightly wrong. This quilt too was supposed to be 140x200 cm and the number of pattern blocks should have been 9x12. But I do not know how my hand wrote 10 instead of 9 in the plan. In any case I sewed the blocks for a quilt that size, laid out the pattern and sewed it together. And when I came at it with a tape measure for the final measurements, it was too late to notice the mistake. The width of the quilt's pattern came out at 165 cm instead of 140 cm.
Happily there is no need to start unpicking and destroying anything. Karl's mother agreed that the boy will grow into a fine, large fellow. I will add a little to the length of the quilt as well, with a beautiful border, to get the proportions of the quilt right.
Combining the pattern.
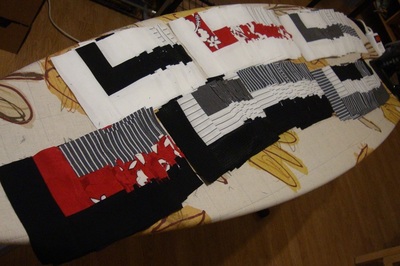
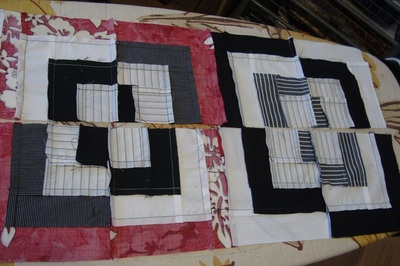
As can be seen in the first picture below, after pressing the pattern blocks I sorted them into stacks by the colour of their outer strips of fabric. Afterwards they are easy to lay out, taking from each stack in turn so that the same colours do not end up facing one another. And keeping an eye on the central squares, dark and light alternating.
Next I laid the blocks out on the floor, 10 x 12 of them:
* the central squares, light and dark alternating;
* blocks in red tones, spread evenly across the whole quilt, so that there are no large red patches or black and white areas;
* blacks and especially light colours balanced across the whole quilt in the same way;
* the outer strips of the blocks, so that the same colour does not end up facing the same colour on the next block.
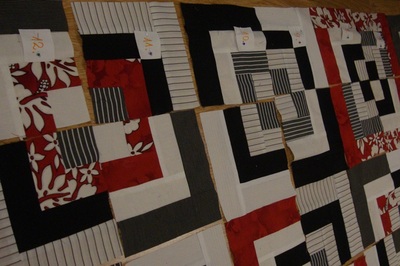
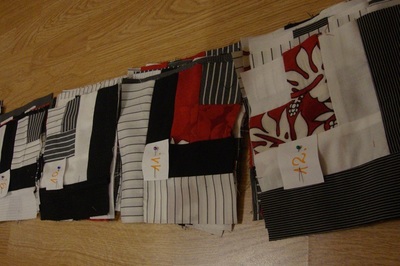
Once the pattern is laid out, I number the first block of each row and stack the rows. I always leave the left hand, numbered block on top. Then at the machine I know which way round to sew the blocks together (into the horizontal rows of the pattern).
Once the blocks are sewn into rows, I press the seams down. As with Kirke's simple square quilt, on this pattern too I press the joining seams of the blocks one way and then the other. On rows of blocks with even numbers, for instance, I press the joining seams to the right. On odd ones to the left. When the rows are sewn together, the crossing seams lie in different directions.
Finally I sew the pattern together for good and press all the lengthwise seams in one direction. From the head end towards the foot, for instance. It is good to know these directions when quilting. If the seams are in a tangle or otherwise random, it is hard to do neat quilting.
I hope the pictures added and the comments are a help.
The picture of the finished pattern is above. To it I will add the borders, the backing, the wadding, the binding and the quilting. There is a guide to those in an earlier post. When the quilt is finished, I will add a picture of it with the greatest pleasure.
Until then, all the best to you, dear fans.
🙂